OPI The Culture of Color
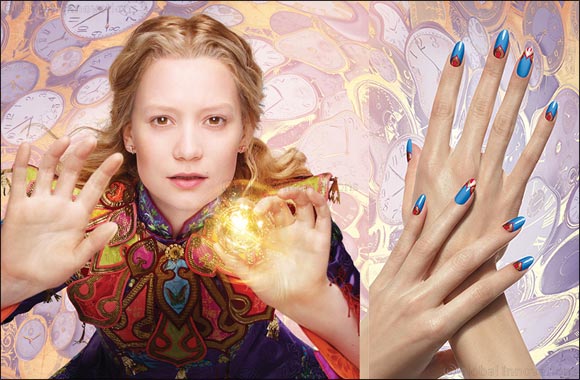
Disney Alice Through the Looking Glass
The world's number one salon nail lacquer brand has gone positively mad.
OPI is celebrating the release of Disney Alice Through The Looking Glass with a new Brights collection inspired by the film's mad, crazy, wonderful characters and their latest adventures.
The story takes Alice back to the whimsical world of Wonderland, where she time travels to save the Mad Hatter, who is not himself.
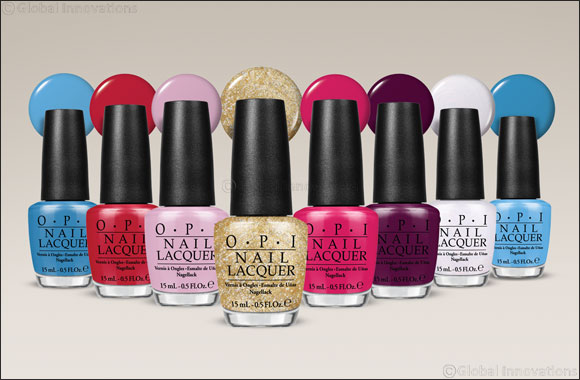
The collection features eight insanely gorgeous limited-edition shades – each available in both lacquer and GelColor formulas
3 nail arts and tips tutorials are revealed to you !
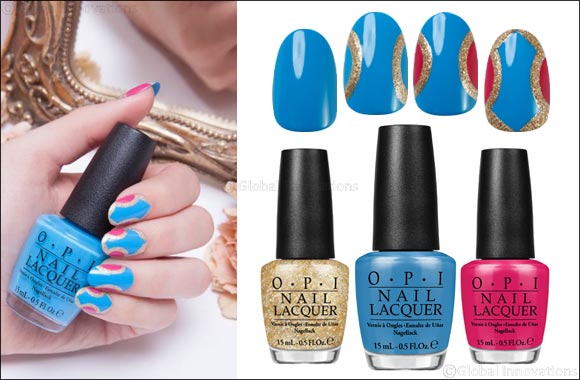
1 - GET THE LOOK INSPIRED BY ALICE
- Apply 2 coats of Fearlessly Alice and leave to dry.
- When the lacquer is dry, cut a paper hole reinforcement sticker in to two and place firmly on to the sides of the nail.
- With a striping or detail brush paint on a thick band of A Mirror Escape following the shape of the paper hole reinforcement sticker. Carefully remove the reinforcement stickers to leave two clean half circles at each side of the nail.
- Fill in the half circles with Mad for Madness Sake using a striping or detail brush.
- Frame the nail by painting on A Mirror Escape from the side of the circle to the middle cuticle end of the nail. Repeat on the other side meeting in the middle to a point. Repeat at the tip.
- Apply OPI Top Coat.
2 - GET THE LOOK INSPIRED BY THE MAD HATTER
- Apply Natural Nail Base Coat.
- Apply 2 coats of “Having a Big Head Day” and leave to dry.
- When the lacquer is dry place a hole reinforcement paper sticker firmly to the centre of the nail leaving a gap at going all around the edge nail.
- Carefully paint the gap around the nail with Oh My Majesty and a striping or detail brush. Remove the paper reinforcer to reveal a clean and evenly framed nail.
- Paint on evenly size and spaced blocks of What's the Hatter with You? going around the nail on top of the frame.
- Apply OPI Top Coat.
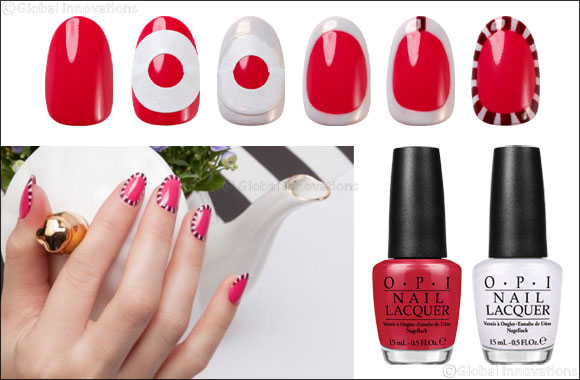
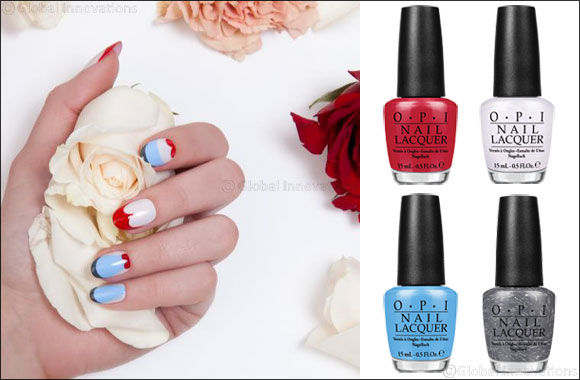
3 - GET THE LOOK INSPIRED BY THE RED QUEEN
Design 1)
- Apply Natural Nail Base Coat
- Apply 2 coats of Oh My Majesty
- Paint on a curved band of The I's Have it from the tip to about half way down the nail.
- Apply a thin french tip using What Time Isn't It and a striping or detail brush
- Paint on half a heart shape coming from the side of the nail to centre using Having a Big Head Day and a tripping or detail brush
- Paint on the other half heart shape from the other side, meeting at a point in the middle using Having a Big Head Day
- Apply OPI Top Coat.
Design 2)
- Apply Natural Nail Base Coat
- Apply 2 coats of Oh My Majesty
- Paint on a line with Having a Big Head Day and a striping or detail brush from the tip to about a third way down the nail.
- Where the line ends, continue it round to the side of the nail with a curved line of the same colour in a half heart shape.
- Repeat on the other side making sure you have a defined point in the middle an even heart shape outline.
- Fill in the tip with Having a Big Head Day
- Apply OPI Top Coat.
Design 3)
- Apply Natural Nail Base Coat
- Apply 2 coats of Oh My Majesty
- Paint on a “V” shape section in the centre of the nail using The I's Have It, the wider section coming from the tip of the nail and tailing out in the centre of the cuticle end.
- Paint on a french tip using What Time Isn't It
- At the cuticle end, paint on half a heart shape from the sidewall to the center, using a striping or detail brush.
- Repeat on the other side to complete the heat shape meeting at a point at the centre cuticle end.
- Apply OPI Top Coat.
Price List:
All OPI nail lacquers at AED 49
POS:
Wojooh, www.wojooh.com, Sephora and all major nail salons
| 